Homemade Bone Broth
Amber-colored broth that gels when cold—the sign of collagen extraction. Simmered 12-24 hours to release amino acids like glutamine and glycine, this is what many of us reach for during flares. A 2025 Mayo Clinic review found bone broth may support gut barrier function in IBD.

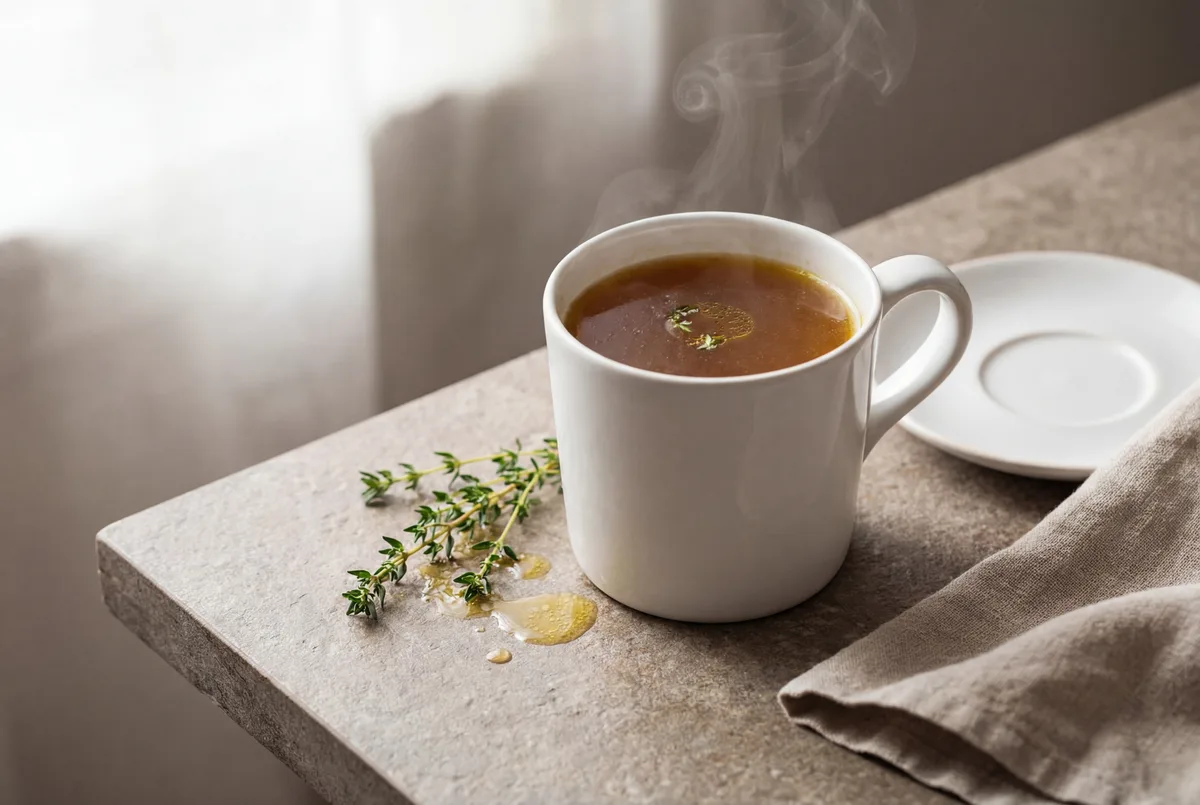
Homemade Bone Broth
Amber-colored broth that gels when cold—the sign of collagen extraction. Simmered 12-24 hours to release amino acids like glutamine and glycine, this is what many of us reach for during flares. A 2025 Mayo Clinic review found bone broth may support gut barrier function in IBD.
Ingredients
- Low FODMAP
- Low FODMAP
- Low FODMAP
- Low FODMAP
- Low FODMAP
- Low FODMAP
- Low FODMAP
- Low FODMAP
- Low FODMAP
- Low FODMAP
Instructions
Place bones in a large stockpot or slow cooker, spreading them in an even layer.
Equipment: large stockpot, slow cookerPour cold water over the bones until they're fully submerged by about 2 inches.
Add apple cider vinegar and let the mixture sit for 20 minutes at room temperature. This acidification step helps extract minerals from the bones.
Tip: The acid helps draw calcium, magnesium, and other minerals from the bones into the liquidAdd salt, bay leaves, peppercorns, leek greens, carrots, and fresh herbs if using.
Bring to a boil over high heat, then immediately reduce to the lowest possible simmer—just a few lazy bubbles breaking the surface.
Skim any foam or impurities from the surface during the first hour for a clearer broth.
Equipment: spoon, ladleTip: Skimming produces a clearer broth but isn't essential for nutritionCover partially and simmer for 12-24 hours, checking occasionally that it maintains a gentle simmer. Add water if level drops below bones. The longer it cooks, the more collagen and amino acids extract into the broth.
Tip: 12 hours extracts good collagen; 24 hours maximizes mineral and amino acid contentStrain the broth through a fine mesh sieve into a large bowl, pressing gently on the solids to extract every drop.
Equipment: fine mesh sieve, large bowlDiscard the solids—they've given all their goodness to the broth.
Let the broth cool to room temperature (about 3 hours), then refrigerate overnight.
Skim the solidified fat layer from the surface if desired, or leave it for extra richness and calories.
Tip: Leave the fat layer for extra calories during flares when appetite is lowStore in airtight containers in the refrigerator for up to 5 days, or freeze in portions for up to 3 months.
Equipment: airtight containers
Notes
Storage
Refrigerate in airtight containers for up to 5 days. Freeze in ice cube trays or 1-cup portions for up to 3 months. The fat cap helps preserve freshness—skim it only when ready to use.
Slow cooker method
Set on low and let it cook for 24 hours unattended. This is the easiest, most hands-off approach and produces excellent collagen extraction.
Instant Pot shortcut
High pressure for 2-3 hours extracts collagen faster, though traditional simmering may yield a richer mineral profile. Still produces a broth that gels.
The gelatin test
Good broth jiggles like Jell-O when refrigerated—this gelatinous texture confirms collagen extraction. If your broth doesn't gel, it's still nutritious but may need more bones or longer cooking next time.
Sourcing bones
Ask your butcher for chicken feet, backs, or carcasses—often free or very cheap. Save bones from roasted chickens in the freezer until you have enough. Feet add the most gelatin.
Roasting for depth
Roast bones at 400°F (200°C) for 30 minutes before simmering to develop a deeper, caramelized flavor. Skip this for a lighter, more neutral broth or during flares when simplicity matters.
Beef bone variation
Substitute with 3-4 lbs beef bones (knuckles, marrow bones, or oxtail) for a richer, heartier broth. Roasting is more essential for beef. Simmer 24+ hours for best results.
IBD Considerations
Diet Protocol Compliance
How this recipe fits common IBD dietary approaches